


Laundry Design Tips & Tricks
Smart, practical ideas to help you plan a laundry that stays tidy, works efficiently, and holds up long-term, especially in smaller spaces.
You can click on any of the images in this guide to enlarge them.
-
Keep it ergonomic: set up a simple “wash → dry → fold” flow
The best laundries are the ones you don’t have to think about. Keep your washer and dryer close together, allow room to move, and make sure there’s a comfortable landing zone for baskets and folding.
- Place washer + dryer together (or stack if space is tight)
- Keep a clear folding bench / landing zone nearby
- Plan for basket space so the floor stays clear

Tip: If you have to walk around an open door or basket every day, the room will feel annoying forever, even if it looks great.
-
Use “hideaway” cabinets to keep small laundries looking clean
In compact laundries, visual clutter makes the room feel smaller fast. Our purpose-built laundry cabinets help keep the daily mess out of sight.
- Laundry hamper cabinet: keeps washing tucked away and the room looking tidy
- Ironing board cabinet: a dedicated home so it’s not leaning behind a door
- Perfect for tight spaces where every surface gets used

Tip: The tidiest laundries aren’t the ones with the most storage, they’re the ones where the “everyday items” have a proper home.
-
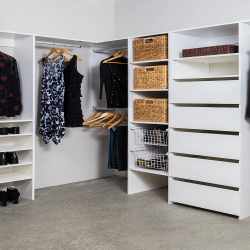
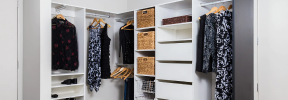
Go tall with storage (linen, hanging rails, broom/vacuum space)
Tall cabinets are a game-changer for laundries, especially if you want to store linen, bulk supplies, and awkward items like mops and vacuums.
- Our tall laundry + wardrobe cabinets can be configured for linen storage, hanging rails, or broom space
- Slide-out rack cabinet is perfect for cleaning bottles and supplies (easy to access, easy to keep organised)
- Mix wall cabinets with a hanging rail to create a practical hanging zone above the sink (great for drip-dry items)

Tip: If you’re choosing between “one more drawer” or “one tall cabinet”, the tall cabinet usually wins in a laundry.
-
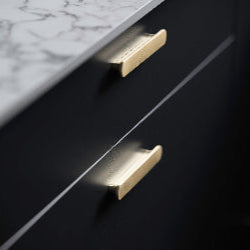
Add some flair: feature wall cabinets in an oak or woodgrain
A laundry doesn’t have to feel like a utility cupboard. One of the easiest upgrades is changing the wall cabinets to an oak or woodgrain finish, it adds warmth and looks seriously premium.
- Woodgrains are very popular right now (especially paired with white base cabinets)
- Use colour/woodgrain on uppers to lift the room without overwhelming it
- Works beautifully with white benchtops and stainless/chrome tapware

Tip: If you want the “designer” look without spending big, do the uppers in woodgrain and keep everything else simple.
-
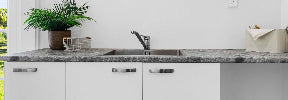
Choose the right sink + tap (it changes how the laundry feels to use)
From tiny laundries to full-size utility rooms, the right sink and tap makes everyday jobs easier: rinsing, soaking, filling buckets, even cleaning.
- We have sinks to suit everything from super small spaces to large, deep utility sinks
- A pull-out spray tap is a lifesaver for filling buckets, rinsing, and getting the tap out of the way when you need bench space
- Think about what you actually do in your laundry (pets, sports gear, soaking, handwashing)

Tip: If you’re stuck between two sink sizes go bigger. Nobody ever regrets having a more useful sink.
-
Appliance voids: give washer + dryer enough breathing room
Washing machines and dryers are the appliance that moves around the most — so it’s worth planning the void properly now to avoid install headaches later.
- 620mm minimum void for both washer and dryer
- 630–635mm is optimal (more forgiving for hoses, plugs, and appliance variation)
- Don’t forget access for power, taps, and drainage

Note: A slightly larger void is usually invisible once installed, but it can save you big stress on install day.
-
Wet-proof everything properly (it’s worth the small extra cost)
Laundries are wet zones and splashes happen. Small upgrades in wet-proofing now can save expensive damage later.
- Get all sides of your benchtop edged (small increase in cost, big increase in durability)
- Proper edging helps prevent the substrate from swelling/blowing if moisture gets in
- Use a reputable installer and make sure everything is sealed and siliconed well

Tip: Water damage is one of those things you don’t notice until it’s too late. Edge it, seal it, silicone it properly.
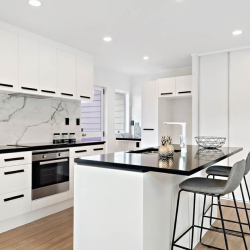
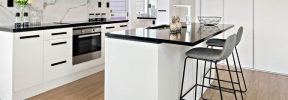
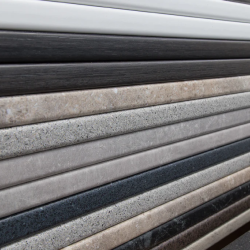
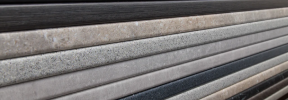
Inspiration Gallery
A few laundry setups to spark ideas for layout, storage, and finishes.


