


Kitchen Design Tips & Tricks
Simple, practical design rules that make a kitchen feel easier to use, easier to store in, and better long-term, before you lock anything in.
You can click on any of the images in this guide to enlarge them.
-
Design with the working triangle
A kitchen can look amazing and still feel painful if the “everyday loop” is awkward. Aim for short, clear movement between your main zones.
- Put prep space next to the sink (where food gets rinsed)
- Keep the cook zone close to drawers/cabinets that hold pans + utensils
- Don’t make the dishwasher block your main walkway when open

Tip: If two people can’t pass each other or open drawers comfortably, the kitchen will feel “small” no matter the size.
-
Put the storage where you actually use it
The secret to a kitchen that stays tidy is not “more storage”, it’s storage in the right spot.
- Plates + bowls near the dishwasher for easy unloading
- Pots/pans and cooking tools near the cooktop
- Rubbish/recycling close to prep space (not across the room)

Tip: If you’re constantly crossing the kitchen to put one thing away, clutter builds up fast.
-
Use tall cabinets to “delete” bench clutter
Tall storage is the easiest way to make a kitchen feel calmer. It gives appliances and pantry items a home so the benchtop stays clear.
Pull out pantry
- Plan one tall zone for pantry + bulk items
- Consider where brooms/vacuum will live (so they’re not behind the fridge)
- Group tall cabinets together so the kitchen looks intentional (not patchy)

Tip: When in doubt: fewer items on the bench = the kitchen looks more expensive instantly.
-
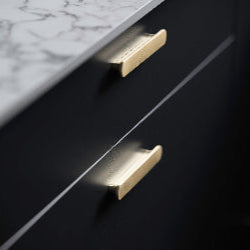
Feature wall cabinets in a woodgrain (easy “designer” upgrade)
If you want a warmer, more premium look without going overboard, changing just the uppers to a woodgrain/oak vibe is a super popular move.
- Woodgrain uppers + white bases = clean, modern, and timeless
- Keep benchtops and splashback simple so the woodgrain stands out
- Match handles/tapware finishes for a cohesive look

Tip: Do the “feature” finish up high, it adds warmth without making the kitchen feel heavy.
-
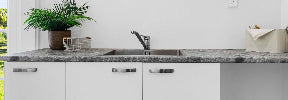
Choose the right sink + tap for how you actually cook
Your sink and tap get used constantly. Choosing the right size and function makes everyday life easier (and cleaner).
- Bigger/deeper sinks handle trays, pots, and awkward dishes
- A pull-out spray tap is brilliant for rinsing + cleaning the sink itself
- Check the tap position so it doesn’t clash with windows or splashbacks

Tip: If you’re between two sink sizes, go larger, it’s one of those upgrades you feel every day.
-
Appliance reality-check: clearances + door swings
A plan can look perfect but fail on install day if appliance doors clash or gaps are too tight. Always allow room for real-life movement.
- Check fridge door swing + handle clearance
- Make sure oven/dishwasher doors can open without blocking the whole room
- Plan power point access (you don’t want to uninstall an appliance to reach a plug)

Note: A few extra millimetres is usually invisible but it can save you a world of pain later.
-
Wet-proof your benchtops properly (edge it, seal it, silicone it)
Kitchen benches live in a splash zone. A small upgrade in edging and sealing can prevent moisture getting into the substrate over time.
- Get exposed edges finished properly (especially near sink/dishwasher)
- Use a reputable installer and make sure sealing/silicone work is done well
- Pay extra attention to joins and cut-outs where water finds its way in

Tip: Water damage is the slow, expensive kind. A little prevention here is genuinely worth it.
-
Finishing touches that make it look “built-in”
These are the small details that make a modular kitchen look clean and intentional.
- Use end panels to finish visible cabinet ends
- Fill awkward gaps with fillers so lines look straight and deliberate
- Keep handle style consistent across the kitchen for a more premium look

Tip: If you can see raw edges, gaps, or “unfinished ends” it reads as DIY even if the cabinets are gorgeous.
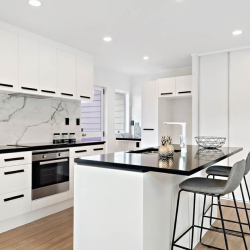
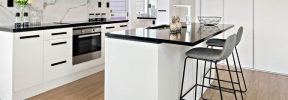
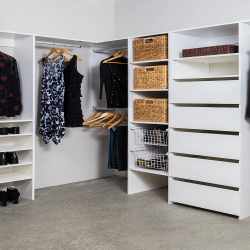
Inspiration Gallery
A few kitchen setups to spark ideas for layout, storage, and finishes.


