


Colour Refresh Tool - Complete Guide
This guide shows you how to order standard fronts and panels using the Cabjaks Colour Refresh Tool.
You can click on any of the images in this guide to enlarge them.
-
1
Open the Colour Refresh Tool
Navigate to the Colour Refresh Tool. In the first step, we have some provided some information regarding designing with colour. Once you have reviewed this stage, tick the 2 boxes and click 'continue'.

-
2
Choose your colour
Decide on the colour you would like to plan your refresh in.

-
3
Select fronts for your cabinets with doors
Begin by selecting any base, tall and wall cabinets with doors only. You can use the drop down on the left to change the cabinet type.
When you click on the front you require, a pop up will allow you to select the variants required, i.e. cabinet width.

-
4
Select fronts for your cabinets with drawers
Click 'next' and you will see all of the base cabinet fronts with drawers only. Choose any of your required drawer cabinets here.

-
5
Select fronts for your cabinets with doors and drawers
Click 'next' and you will see the options for cabinets with a mix of doors and drawers. Use the dropdown to switch between base and tall cabinet options.

-
6
Choose the correct drawer type
When adding drawer fronts, ensure that you are selecting the correct existing drawer type. Click on the drop down to choose between soft close or standard drawers. This will ensure the drilling on your new fronts matches the existing hardware in your Cabjaks cabinets.

-
7
Select open cabinets
Click 'next' to view the open, microwave, oven and wine rack cabinet options. Any open cabinets like these will be provided as fully assembled, new cabinets. They are unable to be converted or refreshed due to the way they are assembled.

-
8
Select your finishing panels
Click 'next' to proceed to the finishing panels section. Here you can select any end panels, filler panels and toe kicks you require.

Note: If you are planning to refresh to a new colour, you will need to replace all end panels and ensure that sides of all carcasses are covered with a coloured end panel.
-
9
Review your selections
At the final stage, you can have a look through the items you have added and change the colour of your fronts. When you are happy with the cart, you can either click 'save' to add it to the saved carts on your account or click 'add to cart' if you are ready to proceed with the checkout for these items.

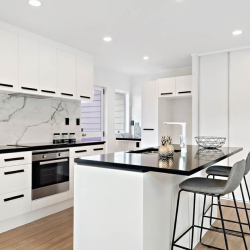
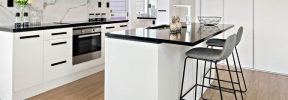
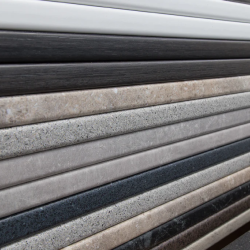
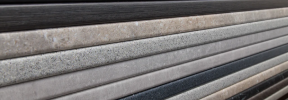
Inspiration Gallery

New Oak Noir fronts

Colour samples in the showroom

Baroque fronts

Anthracite fronts

French Oak bar back panel

Premium Oak fronts