


Laundry Planner - Complete Guide
This guide will show you how to design your laundry using the Cabjaks Planner, from creating your room layout to saving a complete, ready-to-order design.
You can click on any of the images in this guide to enlarge them.
-
Create a new plan
Open the laundry planner and click create new plan.
Enter your room size measurements, then choose the colour you'd like to plan in. You can only have 1 colour in your cart at any one time so you may need to save and clear your cart before starting a new colour plan.
Click Next Step to enter the planner.

Tip: Planning in colour initially means you can toggle between white and coloured cabinets. You can change the colour at any time in the planner.
-
Add base and tall cabinets to plan
Select a cabinet from the preview panel on the right and drag it into the planner.
Position the cabinets in your desired location. You can always edit the cabinet options such as width, depth and handle side as well as rotate the cabinets to suit your plan.

Tip: Planning in colour initially means you can toggle between white and coloured cabinets. You can change the colour at any time in the planner.
-
Add finishing panels
Drag and drop your required finishing panels into the planner and position as needed.
End panels should be used to cover the end of a row of cabinets and line voids for appliances.
Filler panels should be used wherever needed to fill gaps and to create functional corners.
Bar back panels are designed to cover the back of the cabinets in an island or breakfast bar formation.

Note: The adjustable feet on your cabinets will need to be covered by end panels and toe kicks so make sure to cover any areas where these feet might be seen from. You can select your toe kicks at step 5 of the planner.
-
Add wall cabinets
Click on next step to proceed to the wall layout stage.
Drag and drop your wall cabinets into the planner and select your required variants. Adjust the placement to suit your design.

Note: In the 'wall layout' stage, you are only able to edit the wall and tall components. To go back and edit base components, just click on the circle in the progress bar above the planner labeled 'base layout.'
-
Add notes to your plan
Click next step, then click anywhere in the plan to add notes.
Type your note then click save and position it where needed by dragging the number.
This is useful for recording design decisions or reminders such as filler cut lengths and appliance voids.

-
Review plan
Click next step to review your plan.
Click on show front view to see your kitchen from different angles.
This can help you to check alignment and review the overall appearance of each wall.

Note: If any of your cabinets are not sitting against a wall in the planner, they will not show in the front views.
-
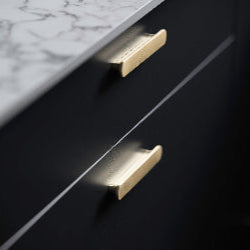
Choose from upgrades
Choose your preferred:
- Handles
- Hinges
- Drawers
- Toe kick size

Note: Your plan total will update in real time as you select options and make changes.
-
Save your plan
Click save.
If you are already logged in to your Cabjaks account, you will be prompted to give your plan a name before saving it.
If you are not yet logged in, you will be shown the log in pop-up, you can also create a new account from here. Once logged in, you will be prompted to give your plan a name.

Note: Saved plans, carts and other account details can be viewed by clicking on the person icon located in the navigation bar at the top of your screen.
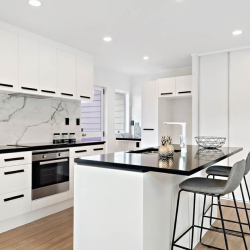
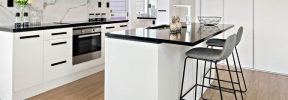
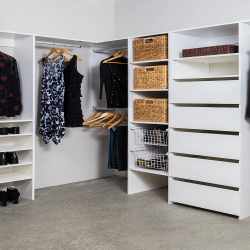
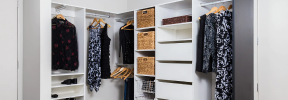
Inspiration Gallery
See how others have used the Laundry Planner to plan and order their laundry.


